
A well-maintained cap is not just a fashion statement; it’s a reflection of personal style and hygiene. Proper cap care involves more than just a quick wipe; it requires a thoughtful approach to preserve its quality and shape.
Gentle cleaning techniques are essential to extend the life of your cap. Different materials and constructions demand specific care methods. Understanding these nuances is crucial for effective cap maintenance.
This guide will walk you through the best practices for washing your cap without causing damage, ensuring it remains a staple in your wardrobe for a long time.
Understanding Different Cap Types and Materials
Understanding the type of cap you own is crucial for its maintenance and longevity. Caps vary widely in terms of their material and construction, and this diversity necessitates different care approaches.
Structural Differences
The structure of a cap, including its bill construction and interior components, plays a significant role in determining its cleaning needs. Some caps have a more complex construction that requires careful handling.
Material Variations
Caps are made from a variety of materials, including cotton, wool, synthetic materials, leather, and suede. Each material has its unique cleaning requirements.
Cotton and Canvas Caps are generally easy to clean and can usually withstand machine washing. However, it’s essential to check the label.
Wool Caps require more delicate care, often needing hand washing to prevent shrinkage and damage to the fibers.
Synthetic Materials are typically durable and can be machine washed, but high temperatures should be avoided.
Leather and Suede Components demand special care, as they can be damaged by water and require specific cleaning products.
The bill of a cap, whether it’s stiff or flexible, can affect how it’s cleaned. Stiff bills may require more careful handling to maintain their shape.
Examining Interior Components
The interior of a cap, including sweatbands and linings, can also impact its cleaning. Some interiors may be removable and washable, while others may not.
By understanding these differences, you can better care for your cap and ensure it remains in good condition.
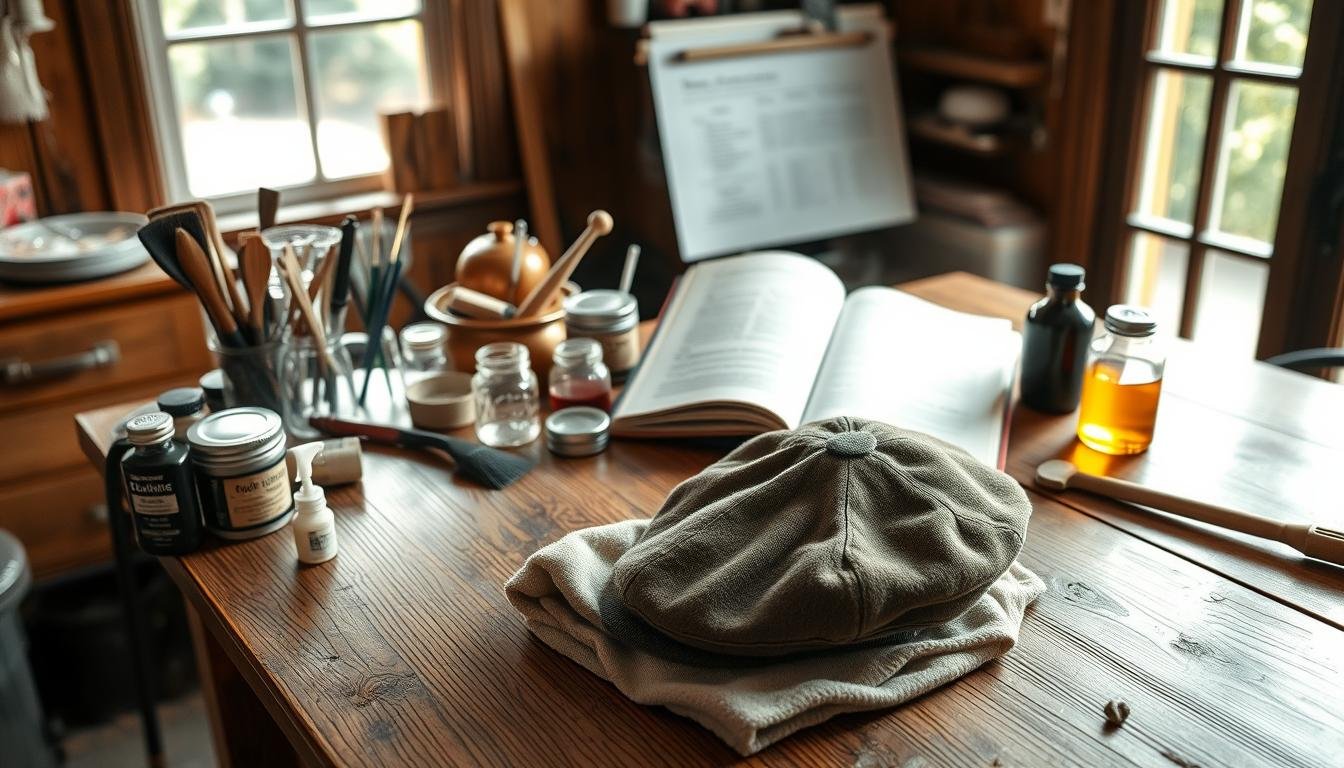
Essential Supplies for Cap Cleaning
The key to maintaining your cap’s quality lies in using the appropriate cleaning tools and materials. To clean your cap without damage, you’ll need a few essential supplies that are easy to find.
Mild Detergents and Cleaners
Using a mild detergent is crucial for cleaning your cap. Avoid harsh chemicals that can damage the material or cause color fading. Opt for a detergent specifically designed for cleaning delicate fabrics.
Stain Removers for Caps
For tough stains, a stain remover can be a lifesaver. Look for a remover that is safe for the type of material your cap is made of. Apply it carefully to avoid damaging the surrounding fabric.
A soft-bristled brush is perfect for gently scrubbing away dirt and stains. Use it to apply your cleaning solution or stain remover, working it into the fabric with gentle circular motions.
Cap Forms and Shapers
To maintain your cap’s shape while it dries, use a cap form or shaper. These tools help prevent deformation and ensure your cap retains its original shape and fit.
By having these essential supplies on hand, you’ll be well-equipped to follow the best cap cleaning instructions and keep your cap looking its best.
Pre-Cleaning Assessment and Preparation
To ensure your cap remains in good condition, a thorough pre-cleaning assessment is necessary. This step is crucial for understanding the cap’s material, identifying potential risks, and determining the best cleaning approach.
Performing a Spot Test
Before applying any cleaning solution, perform a spot test on an inconspicuous area to check for colorfastness and material reaction. This simple test can save your cap from unwanted damage.
Identifying At-Risk Colors
Some cap colors may run or bleed when exposed to water or cleaning agents. Identifying at-risk colors helps you take extra precautions to protect your cap’s original hue.
Mapping stain locations allows you to focus your cleaning efforts on the most affected areas. This targeted approach ensures a more effective cleaning process.
Determining Stain Types
Different stains require different cleaning strategies. By determining the type of stains on your cap, you can choose the most appropriate cleaning method.
Brushing Techniques
Gently brushing your cap can remove loose dirt and debris. Using the right brushing techniques helps prevent damage to the cap’s material.
Using Compressed Air
For caps with intricate designs or hard-to-reach areas, using compressed air can be an effective way to remove dust and dirt without causing damage.
By following these pre-cleaning steps, you can ensure your cap is properly prepared for cleaning, maintaining its quality and extending its lifespan.
Cap Cleaning – How to Wash Your Cap Without Damage
The art of cleaning a cap involves more than just washing; it’s about preserving the material and shape. To achieve this, it’s crucial to follow a detailed cleaning process that addresses various aspects of cap maintenance.
Preparing the Cleaning Solution
Start by preparing a cleaning solution that is gentle on your cap’s material. Use a mild detergent that is suitable for the type of fabric your cap is made of. Avoid harsh chemicals that can damage the cap’s color or fabric integrity.
Proper Scrubbing Techniques
When scrubbing your cap, use gentle circular motions to remove dirt and stains. Avoid using too much pressure, which can cause wear and tear on the fabric. For tougher stains, you can use a soft-bristled brush to gently scrub the area.
Rinsing your cap thoroughly is essential to remove any remaining detergent. Use cold water to rinse the cap, ensuring that all soap residue is removed. This helps prevent any potential damage to the fabric.
Using Cap Cages or Protectors
Consider using a cap cage or protector when washing your cap to maintain its shape. These tools help prevent the cap from getting crushed or deformed during the washing process.
Selecting the Right Washer Settings
If you decide to machine wash your cap, select a gentle cycle with cold water. Avoid using hot water or intense wash cycles, as they can damage the cap’s material or cause it to shrink.
Adding Caps to Laundry Loads
When washing your cap with other laundry, ensure that the items are similar in color and fabric type. This prevents any potential damage from dye bleeding or fabric friction.
Targeted Cleaning Approach
For caps with specific stains or areas of dirt buildup, use a targeted cleaning approach. Apply a small amount of cleaning solution directly to the stain and gently scrub the area before rinsing.
Blotting vs. Rubbing Techniques
When cleaning your cap, it’s essential to use a blotting technique rather than rubbing. Blotting helps to remove dirt and stains without damaging the fabric, while rubbing can cause friction that leads to wear and tear.
By following these detailed cap cleaning instructions, you can keep your cap looking its best and extend its lifespan. Remember, the key to cleaning your cap without damage is to be gentle and thorough in your approach.
Tackling Specific Stain Types
Whether it’s sweat, mud, or grease, knowing how to tackle specific stains can extend the life of your cap. Different stains require different removal strategies, and understanding these can save your cap from irreversible damage.
Sweatbands often accumulate grease and grime, requiring degreasing agents for effective cleaning. Use a mild detergent or a specialized degreaser to gently remove sweat residue without damaging the cap material.
Treating Discoloration
Discoloration can occur due to exposure to sunlight or improper cleaning methods. Restoring the original color can be achieved by applying a color-restoring treatment or a mild bleach solution, depending on the cap material.
Protein-Based Stains
Protein-based stains, such as those from blood or grass, require enzymatic cleaners to break down the protein. Apply the cleaner, let it sit for a few minutes, and then rinse thoroughly.
Tannin and Dye Stains
Tannin and dye stains can be challenging to remove. Using a stain remover or a solution of equal parts water and white vinegar can help lift these stains without damaging the cap.
Dry Soil Removal
Dry soil can be gently brushed off using a soft-bristled brush. For more stubborn dry soil, a slightly damp cloth can help remove the dirt without soaking the cap.
Wet Mud Treatment
Wet mud should be allowed to dry completely before cleaning. Once dry, gently brush off the mud, and then use a damp cloth to remove any remaining residue. For persistent stains, a mild soap solution can be applied.
By understanding and applying these cap care techniques and stain removal methods, you can keep your cap looking its best and extend its lifespan.
Proper Drying Techniques to Preserve Cap Shape
Proper drying techniques are vital for preserving the shape and quality of your cap. After washing, the drying process is crucial in maintaining the cap’s original form and functionality.
Creating Proper Air Circulation
To dry your cap effectively, it’s essential to create proper air circulation. This can be achieved by placing the cap in a well-ventilated area or using a fan on a low setting to gently circulate the air around it.
Optimal Drying Positions
The position in which you dry your cap can significantly impact its shape. It’s recommended to dry caps on a flat surface or use a cap drying rack to maintain their original shape.
Commercial Cap Shapers
Commercial cap shapers are designed to help maintain the cap’s shape during the drying process. These tools are specifically made to support the cap’s structure and prevent deformation.
DIY Shaping Solutions
If you don’t have a commercial cap shaper, you can create your own DIY shaping solution. For example, you can stuff the cap with paper towels or a towel to help maintain its shape while it dries.
Heat Sources to Avoid
It’s crucial to avoid using heat sources like hair dryers or radiators to dry your cap, as heat can damage the material and cause it to lose its shape.
Preventing Mildew During Drying
To prevent mildew, ensure your cap is completely dry before storing it. If you’re drying your cap in a humid environment, consider using a dehumidifier to speed up the drying process.
| Drying Method | Effectiveness | Recommendation |
|---|---|---|
| Air Circulation | High | Use a fan on low |
| Cap Shapers | Very High | Invest in a commercial shaper |
| Heat Sources | Low | Avoid using heat |
By following these proper drying techniques, you can ensure your cap remains in excellent condition, maintaining its shape and quality for a longer period.
Reshaping Your Cap After Cleaning
The process of reshaping your cap post-cleaning is vital for preserving its aesthetic appeal and structural integrity. After a thorough cleaning, your cap may lose its original shape, making reshaping a crucial step in cap care techniques.
Depending on your cap’s style, you may need to reshape the bill to its original form. For flat bills, simply laying the cap on a flat surface can help. For curved bills, using a curved surface or a specifically designed tool can aid in achieving the desired curvature.
Fixing Warped Brims
Warped brims can be fixed by gently bending the brim back into shape. For more stubborn warps, applying a small amount of steam can help relax the material, making it easier to reshape.
Stuffing Methods
One effective method for reshaping caps is stuffing them with paper or a towel to maintain their shape while they dry. This technique is particularly useful for caps that have lost their shape during the cleaning process.
Steam Reshaping
Steam can be a powerful tool in reshaping caps. By applying steam to the areas that need reshaping, you can relax the fibers, making it easier to mold the cap back to its original shape.
Light Ironing Techniques
For caps made from materials that can be ironed, using a light ironing technique can help remove wrinkles and creases. It’s essential to use a low heat setting and a pressing cloth to avoid damaging the cap.
Using Fabric Sprays
Fabric sprays can be used to help maintain the shape of your cap. These sprays can stiffen the material, making it easier to hold its shape, and can also help reduce wrinkles.
By employing these cap care techniques, you can ensure your cap remains in excellent condition, retaining both its style and functionality. Regular cap maintenance will also extend the life of your cap, making it a worthwhile investment for anyone looking to keep their headwear in top condition.
Preventative Maintenance and Regular Care
Maintaining your cap regularly can significantly enhance its durability and appearance. Regular care is not just about cleaning; it’s about preserving the quality and extending the life of your cap.
Cap Racks and Holders
Using cap racks and holders is an effective way to store your caps when not in use. This helps maintain their shape and prevents unnecessary wear and tear. Investing in a good cap rack can make a significant difference in the longevity of your caps.
Travel Storage Solutions
When traveling, it’s essential to store your caps properly to prevent damage. Using protective cases or bags can help keep your caps clean and maintain their shape. Consider using breathable storage bags to prevent moisture buildup.
Implementing a weekly maintenance schedule can help keep your caps in top condition. This includes regular cleaning and inspecting your caps for any signs of wear.
| Maintenance Task | Frequency | Benefit |
|---|---|---|
| Cleaning | Weekly | Removes dirt and stains |
| Inspection | Weekly | Identifies wear and tear early |
| Storage | Daily | Maintains shape and prevents damage |
On-the-Go Cleaning Hacks
For quick cleanups, consider using cap cleaning wipes or a damp cloth. These are effective for removing surface dirt and stains on the go.
Seasonal Cleaning Timeline
Adjust your cleaning schedule according to the season. For example, caps used more frequently during summer may require more frequent cleaning.
Usage-Based Cleaning Schedule
Clean your caps based on how often you wear them. Caps that are worn daily will need more frequent cleaning compared to those worn occasionally.
By incorporating these preventative maintenance and regular care tips, you can significantly extend the life of your caps and keep them looking their best.
Keep Your Caps Looking New: Final Tips and Tricks
Maintaining your caps requires attention to detail and a commitment to gentle care. By following the cap care techniques outlined in this hat washing guide, you can extend the life of your caps and keep them looking their best.
Regular cleaning is essential, but it’s equally important to store your caps properly to prevent damage. Avoid exposing your caps to direct sunlight or moisture, as this can cause fading or discoloration. When not in use, store your caps in a cool, dry place, using cap cleaning instructions to reshape and maintain their original form.
By incorporating these simple cap care techniques into your daily routine, you can enjoy your favorite caps for years to come. Whether you’re a sports enthusiast or a fashion-conscious consumer, proper care and maintenance are key to preserving the quality and appearance of your caps.