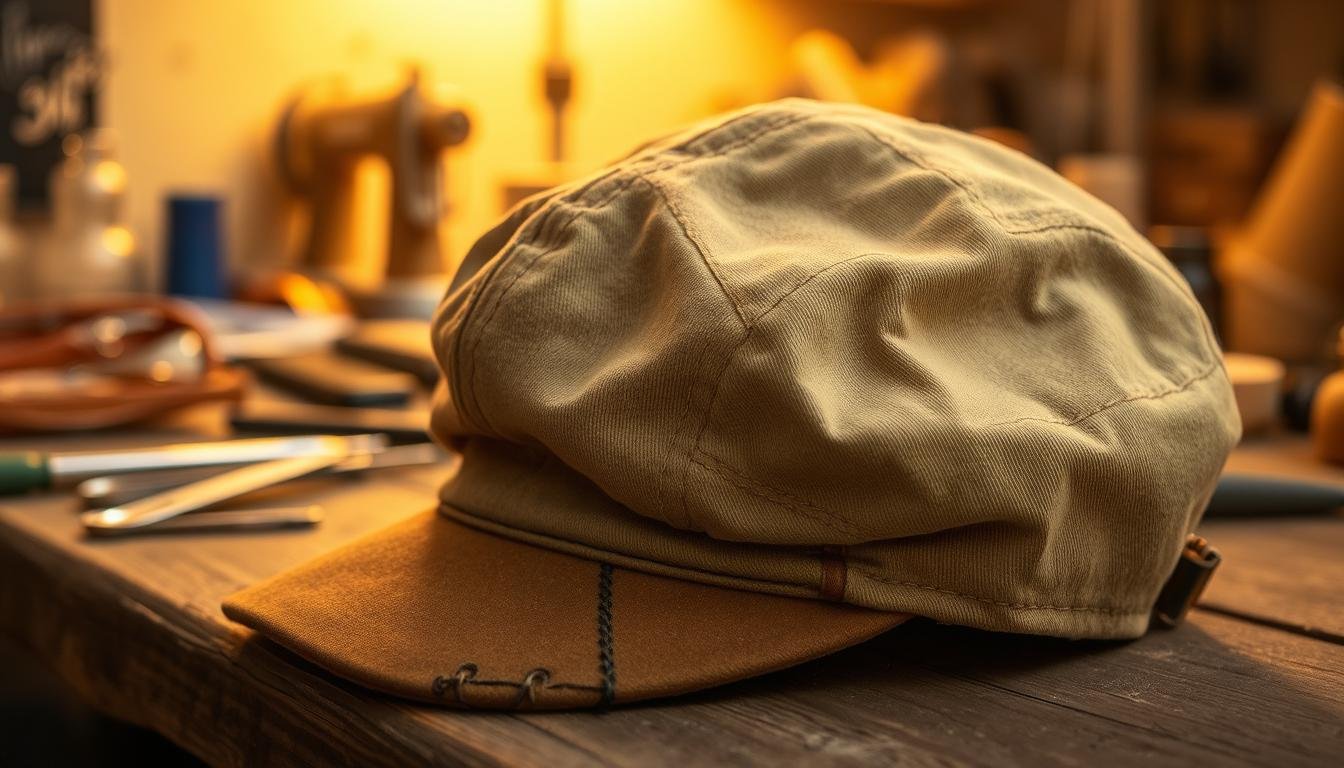

Restoring vintage caps to their original glory is an art that requires precision and dedication. For collectors and enthusiasts, a well-restored cap can be a prized possession, evoking memories of a bygone era. The process of vintage cap repair involves meticulous attention to detail, from cleaning and refurbishing to reconditioning the cap’s original shape and appearance.
When it comes to reselling, the debate surrounding whether to sell dirty gear or not is ongoing. However, most buyers expect a wearable item to be fresh out of the box. This is where cap restoration plays a crucial role, breathing new life into vintage caps and making them wearable again. By restoring these caps, sellers can command a higher price, and buyers can enjoy a product that looks and feels like new.
The Value of Vintage Caps: Why Restoration Matters
Restoring vintage caps is not just about preserving old hats; it’s about reviving history and personal stories. Vintage caps are more than just fashion accessories; they are tangible connections to the past, holding sentimental value for many. The process of Hat Refurbishment and Cap Refinishing requires skill and patience, but the result is well worth the effort.
Vintage caps can be worn for both practical and decorative reasons, regardless of age or fashion preference. However, over time, they can lose their shape and original charm. This is where restoration comes in, offering a way to preserve these treasured items for future generations. By restoring vintage caps, individuals can maintain their family’s history and cultural heritage.
For those interested in learning more about protecting their vintage caps from further damage, such as sun damage, there are resources available that provide guidance on preventing fading and discoloration. This not only helps in maintaining the cap’s original appearance but also ensures its longevity.
In conclusion, the restoration of vintage caps is a valuable practice that preserves history, maintains family heirlooms, and supports sustainable fashion. Through Cap Refinishing and careful restoration techniques, these caps can continue to be enjoyed for years to come.
Assessing Your Vintage Cap’s Condition
Before you start restoring your vintage cap, it’s essential to assess its condition thoroughly. Understanding the material and current state of your cap is crucial for a successful Cap Renewal process.
Vintage caps were made from a variety of materials, including full cotton, polyester blends, wool, and corduroy. The higher-end caps often featured wool or corduroy builds, which require special care during restoration.
To assess your vintage cap’s condition, consider the following factors:
- The type of material used in its construction
- Any signs of wear, such as fading, tears, or stains
- The condition of the cap’s structure, including its shape and support
- Any embellishments, like logos, patches, or embroidery, and their condition
Evaluating these aspects will help you determine the best approach for Restoring Old Caps. It’s also important to identify any potential challenges or areas that require special attention during the restoration process.
By taking the time to thoroughly assess your vintage cap’s condition, you’ll be better equipped to restore it to its original glory, ensuring a successful Cap Renewal that preserves its heritage and value.
Essential Tools and Materials for Cap Restoration
Restoring vintage caps requires a specific set of tools and materials to ensure a professional finish. Whether you’re reviving a retro piece or offering Cap Cleaning Services, having the right equipment is crucial.
To start, you’ll need a few basic items. A clean bucket, soft-bristled brush, and old hand towels are essentials for gently cleaning the cap without damaging its fabric. For tougher stains, a bowl, dishwashing gloves, and OxiClean can be very effective. If the cap’s shape has been compromised, a custom-built crown crutch can be invaluable for reshaping.
The art of cap restoration is about precision and care. For Retro Headwear Revival, it’s not just about cleaning but also about restoring the cap’s original shape and look. This involves a thoughtful selection of materials and tools, ensuring that every step of the restoration process is done with the utmost care.
- A soft-bristled brush for gentle cleaning
- OxiClean for removing tough stains
- Old hand towels for drying
- A clean bucket for soaking
- Dishwashing gloves for protection
- A custom-built crown crutch for reshaping
By using these tools and materials, you can ensure that your vintage cap is restored to its former glory, ready to be worn or displayed with pride.
Cap Restoration – Repairing and Refreshing Vintage Caps: Step-by-Step Process
Restoring a vintage cap is a meticulous process that requires patience and attention to detail. The first step in this process is inspecting the cap for any damage or wear that needs to be addressed.
Cleaning and Preparing the Cap for Restoration
Before any restoration work begins, it’s essential to inspect the cap thoroughly. Any mending or repairs, including replacing the snapback or strap, should be done before cleaning the cap. This ensures that any damaged parts are fixed before they are cleaned, preventing further damage.
The restoration process involves several key steps:
- Inspecting the cap for damage or wear
- Cleaning the cap gently to remove dirt and grime
- Repairing or replacing damaged parts, such as the snapback or strap
- Reshaping the cap to its original form
To illustrate the steps involved in cap restoration, consider the following table that outlines the process and the tools required for each step:
| Step | Description | Tools Required |
|---|---|---|
| Inspection | Examine the cap for damage or wear | Magnifying glass, inspection light |
| Cleaning | Gently clean the cap to remove dirt and grime | Soft brush, mild detergent, water |
| Repair | Fix or replace damaged parts | Needle, thread, replacement parts (e.g., snapback, strap) |
By following these steps and using the right tools, you can restore your vintage cap to its former glory. The key to successful cap restoration is patience and attention to detail, ensuring that every step is done carefully and thoroughly.
Restoration Tips: Always test cleaning solutions on a small, inconspicuous area first to ensure they won’t damage the cap’s material. Use a soft-bristled brush to gently remove dirt and debris.
Deep Cleaning Techniques for Vintage Caps
The art of restoring vintage caps involves meticulous deep cleaning techniques to preserve their original charm. When it comes to Hat Refurbishment, cleaning is a crucial step that requires patience and care. Vintage caps often accumulate dirt and grime over time, which can be challenging to remove without damaging the material.
To start the deep cleaning process, gently dunk the cap into a cleaning solution, stir it around, and let it soak for about an hour. However, it’s critical to monitor the soaking time to avoid ruining the bill, especially if it’s made of cardboard, or causing the colors to bleed. The key to successful Cap Refinishing lies in balancing thorough cleaning with the preservation of the cap’s original integrity.
For caps with stubborn stains, a soft-bristled brush can be used to gently scrub the affected areas. It’s essential to use cleaning products that are compatible with the cap’s material, whether it’s cotton, wool, or synthetic fibers. Harsh chemicals can damage the fabric, cause discoloration, or weaken the cap’s structure.
After cleaning, reshape the cap to its original form and allow it to air dry. Avoid using heat to speed up the drying process, as this can cause shrinkage or further damage. By adopting a gentle and informed approach to deep cleaning, you can significantly enhance the appearance and longevity of your vintage cap, making it a treasured item for years to come.
Effective deep cleaning is not just about removing dirt; it’s about restoring the cap to a state that honors its original craftsmanship. With the right techniques and a bit of patience, you can achieve remarkable results in your Hat Refurbishment endeavors.
Structural Repairs: Restoring Shape and Support
Reviving a vintage cap involves a detailed approach to restoring its original shape and structural support. This process is crucial for cap renewal, ensuring that the cap not only looks its best but also retains its functionality.
One effective method for restoring a cap’s shape is using hat inserts. These inserts can modify the size of the cap and fill in any gaps, providing the necessary support to maintain its original form. Hat inserts are particularly useful for caps that have lost their shape over time due to wear and tear.
Another technique involves wetting the cap and reshaping it as it dries. This method allows for a more precise restoration of the cap’s original shape. It’s essential to reshape the cap carefully to avoid any creases or distortions that might become permanent as it dries.
| Restoration Technique | Description | Benefit |
|---|---|---|
| Hat Inserts | Modify cap size and fill gaps | Provides structural support |
| Wetting and Reshaping | Restore original shape | Precise restoration |
By combining these techniques, individuals can effectively restore old caps to a condition that is close to their original state. This not only enhances the cap’s appearance but also extends its lifespan, making it a worthwhile investment for vintage cap enthusiasts.
Restoring vintage caps is not just about aesthetics; it’s also about preserving the history and emotional value attached to these items. Through careful restoration, one can ensure that these caps continue to be cherished for years to come.
Fabric Restoration and Patching Techniques
Fabric restoration and patching are crucial steps in bringing vintage caps back to their original glory. The process involves a detailed approach to repair and restore the fabric, ensuring that the cap retains its original appearance and quality.
When it comes to vintage cap repair, the choice of materials is paramount. For caps made from felt or wool, using a similar color and texture for patching is essential. This not only ensures a seamless repair but also maintains the cap’s authenticity.
One of the key techniques in fabric restoration is patching holes or worn-out areas. This can be achieved by using a needle and thread that matches the original stitching as closely as possible. For more extensive damage, a patch can be sewn over the affected area using a matching fabric.
For a more detailed guide on cap maintenance, including cleaning and storage tips, visit our comprehensive guide on cap care. This resource provides valuable insights into preserving your vintage cap’s condition.
Patching Techniques Comparison
| Technique | Description | Best For |
|---|---|---|
| Simple Patching | Using a needle and thread to repair small holes or tears. | Minor damages |
| Reinforced Patching | Sewing a patch over the damaged area for added durability. | Extensive wear and tear |
| Felt Restoration | Re-shaping and re-felting to restore the cap’s original form. | Felt caps with significant damage |
By employing these fabric restoration and patching techniques, you can significantly extend the life of your vintage cap. Whether you’re a collector or an enthusiast, cap cleaning services and restoration can help maintain your cap’s value and appearance.
In conclusion, the art of vintage cap restoration is a nuanced process that requires patience, skill, and attention to detail. By mastering fabric restoration and patching techniques, you can restore your vintage cap to its former glory, ensuring it remains a cherished item for years to come.
Embellishment Renewal: Logos, Patches, and Embroidery
A key aspect of Retro Headwear Revival is the restoration of embellishments, including logos, patches, and intricate embroidery. These elements are not just decorative; they are crucial to the cap’s identity and authenticity.
Restoring logos involves careful cleaning and, if necessary, re-touching or re-embroidery to restore the original vibrancy. For patches, assessing their condition is vital; some may need to be re-attached, while others require complete replacement. Attention to detail is paramount to ensure that the patches are securely fastened and aligned properly.
Embroidery renewal is an art that requires patience and precision. It involves re-creating the original embroidery patterns using techniques and materials that match the original as closely as possible. This not only preserves the cap’s authenticity but also enhances its aesthetic appeal.
The following table outlines the key steps and considerations for embellishment renewal:
| Embellishment Type | Restoration Steps | Considerations |
|---|---|---|
| Logos | Cleaning, re-touching, re-embroidery | Material matching, color vibrancy |
| Patches | Assessing condition, re-attaching, replacing | Secure fastening, proper alignment |
| Embroidery | Re-creating patterns, material selection | Precision, authenticity, aesthetic appeal |
By focusing on the renewal of logos, patches, and embroidery, collectors and restorers can significantly enhance the value and appeal of vintage caps, contributing to the Vintage Hat Refurbishing community’s efforts to preserve retro headwear.
Common Mistakes to Avoid During Cap Restoration
Restoring a vintage cap can be a rewarding experience, but it requires careful consideration to avoid common pitfalls. Cap restoration is a delicate process that demands attention to detail to achieve a professional-looking result.
Before diving into the restoration process, it’s crucial to evaluate the cap’s condition. Can it withstand being dunked? Will the colors bleed? Is it even worth it? Taking the time to assess these factors can save you from potential disasters. For instance, checking the cap’s material and construction can help you determine the best cleaning method. You can learn more about cap brim care to understand how to keep the visor firm and flat.
Some common mistakes to avoid include:
- Using harsh chemicals that can damage the cap’s material
- Not testing the cleaning solution on a small, inconspicuous area first
- Ignoring the cap’s structural integrity, leading to a loss of shape or support
By being aware of these potential pitfalls, you can take the necessary precautions to ensure a successful hat refurbishment. Remember, patience and attention to detail are key to restoring your vintage cap to its former glory.
In conclusion, avoiding common mistakes during cap restoration requires a combination of knowledge, patience, and attention to detail. By understanding the potential pitfalls and taking the necessary precautions, you can achieve a professional-looking result that will make your vintage cap look like new.
From Worn to Reborn: Showcasing Your Restored Vintage Cap
The art of cap restoration is a true labor of love. With meticulous care and attention to detail, a worn-out vintage cap can be transformed into a stunning piece of history. The process of cap refinishing and cap renewal brings new life to these treasured items, making them shine like new.
A remarkable example of this transformation is a 1990s Feed The Children promotional charity heater that was restored from a filthy $0.25 garage sale find to a valuable vintage piece. With just a few minutes of actual work, this cap was rejuvenated, showcasing the power of cap restoration.
By restoring your vintage cap, you’re not only preserving a piece of history but also giving it a new lease on life. The pride of owning a restored vintage cap is unmatched, and the process of cap refinishing and cap renewal is a true testament to the art of restoration.
Whether you’re a sports enthusiast, a business professional, or a fashion-conscious consumer, a restored vintage cap is a unique and valuable possession that reflects your appreciation for authentic brand heritage.